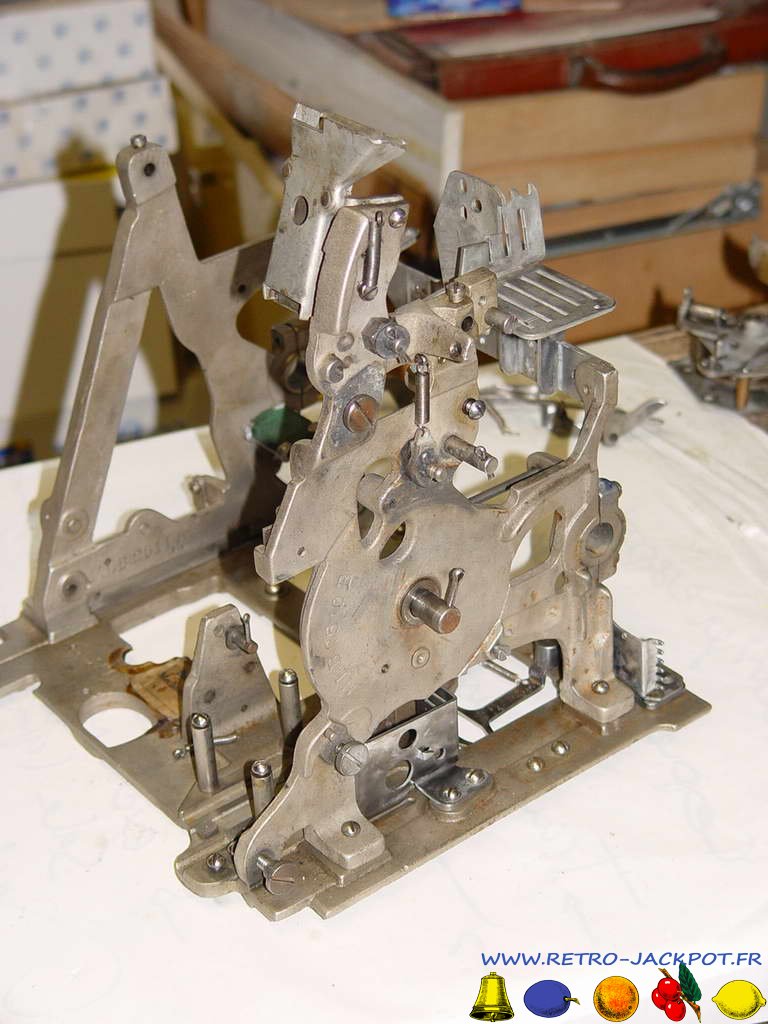
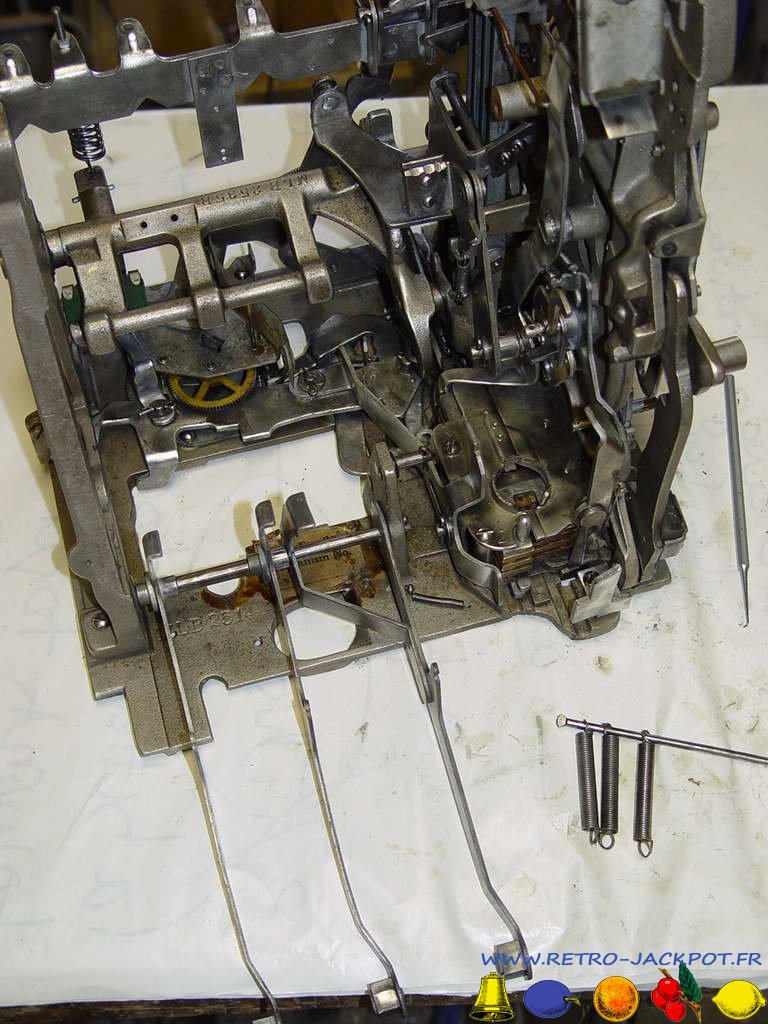
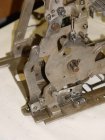
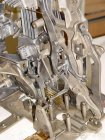
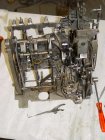
Toutes les pièces ont été dégraissées, brossées et nettoyées. Pendant le remontage, les pièces seront lubrifiées. En fonction des cas, soit par de la vaseline à base de graphite, soit par de l'huile silicone (très lubrifiant et surtout ne fige pas dans le temps). Les ressorts seront huilés pour arrêter la rouille.
![remontage_castle_front_01](/images/phocagallery/MILLS/remontage_castle_front/thumbs/phoca_thumb_m_remontage_castle_front_01.jpg)
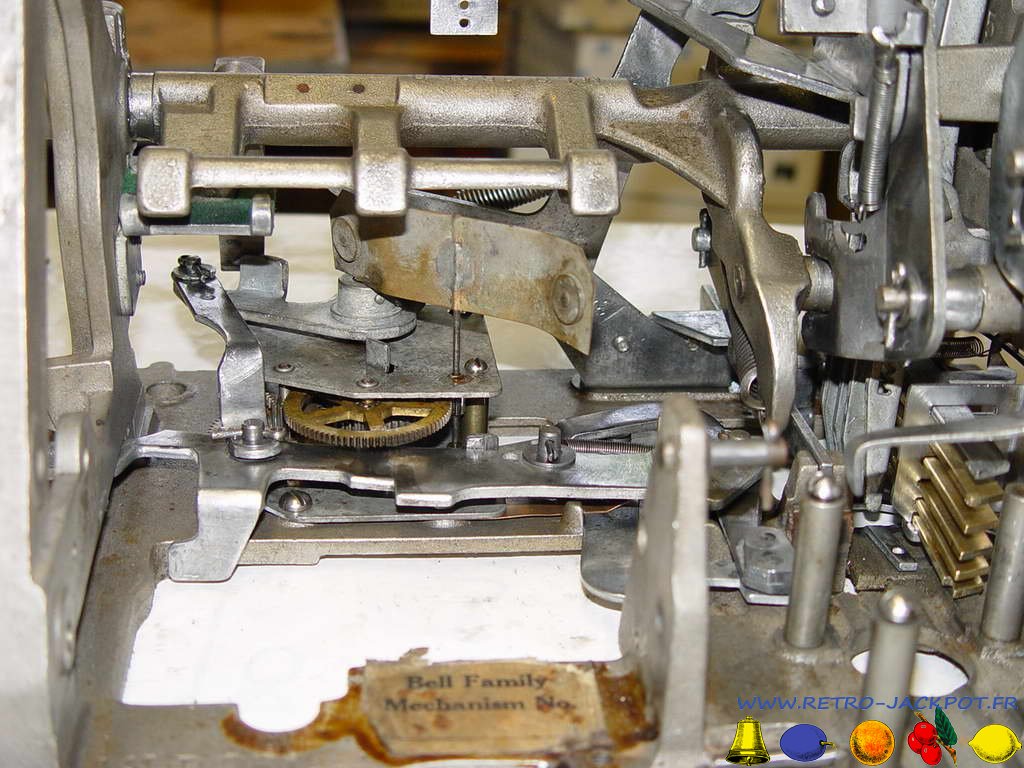
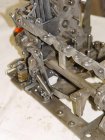
Il y a des parties déjà assemblées : les deux côtés, le "horizontal payout lever guide & lever bracket".
![remontage_castle_front_02](/images/phocagallery/MILLS/remontage_castle_front/thumbs/phoca_thumb_m_remontage_castle_front_02.jpg)
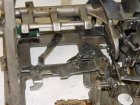
ainsi que le "verticale payout lever guide" et le "safety lever assembly"
![remontage_castle_front_03](/images/phocagallery/MILLS/remontage_castle_front/thumbs/phoca_thumb_m_remontage_castle_front_03.jpg)
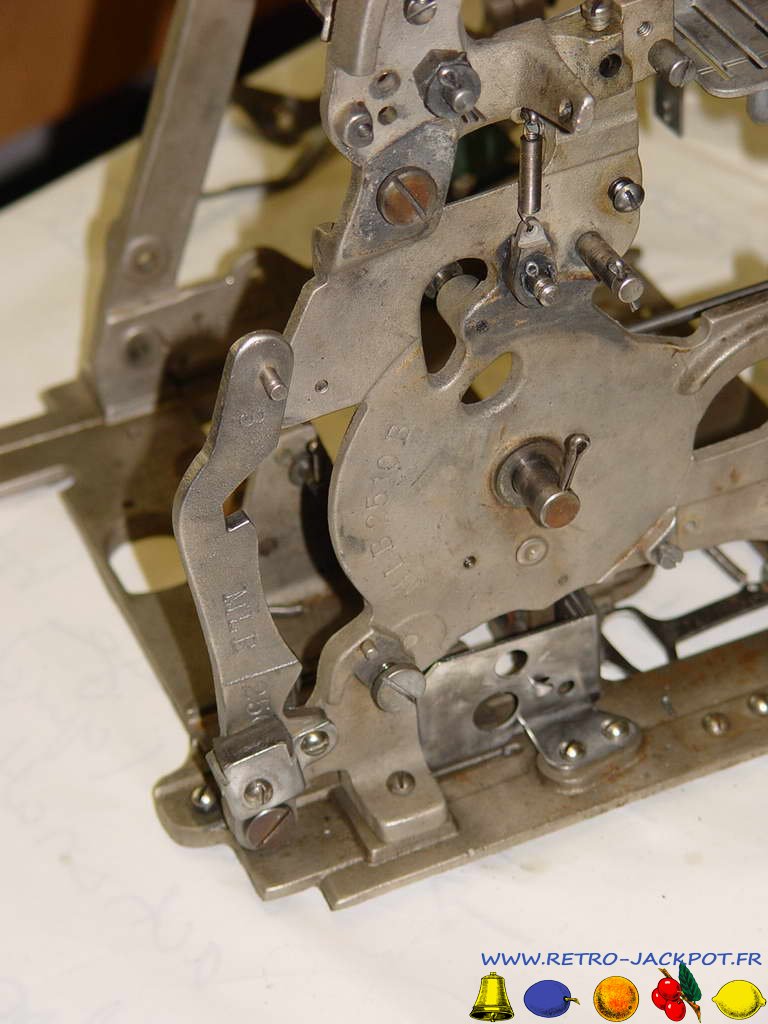
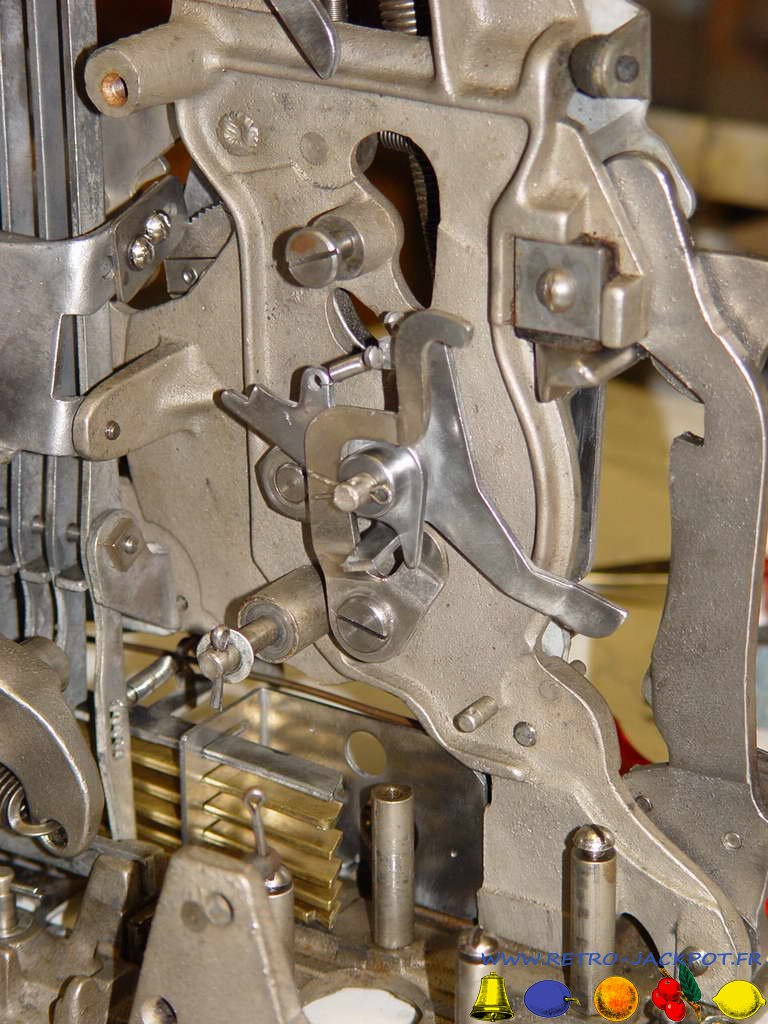
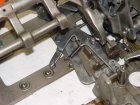
1 : on commence par assembler le "operating lever lock assembly"
![remontage_castle_front_04](/images/phocagallery/MILLS/remontage_castle_front/thumbs/phoca_thumb_m_remontage_castle_front_04.jpg)
2 : puis le "main operating lever & pin assembly" (souvent enlevé)
![remontage_castle_front_05](/images/phocagallery/MILLS/remontage_castle_front/thumbs/phoca_thumb_m_remontage_castle_front_05.jpg)
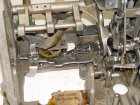
3 : puis le "coin detector operating lever" avec le ressort
![remontage_castle_front_06](/images/phocagallery/MILLS/remontage_castle_front/thumbs/phoca_thumb_m_remontage_castle_front_06.jpg)
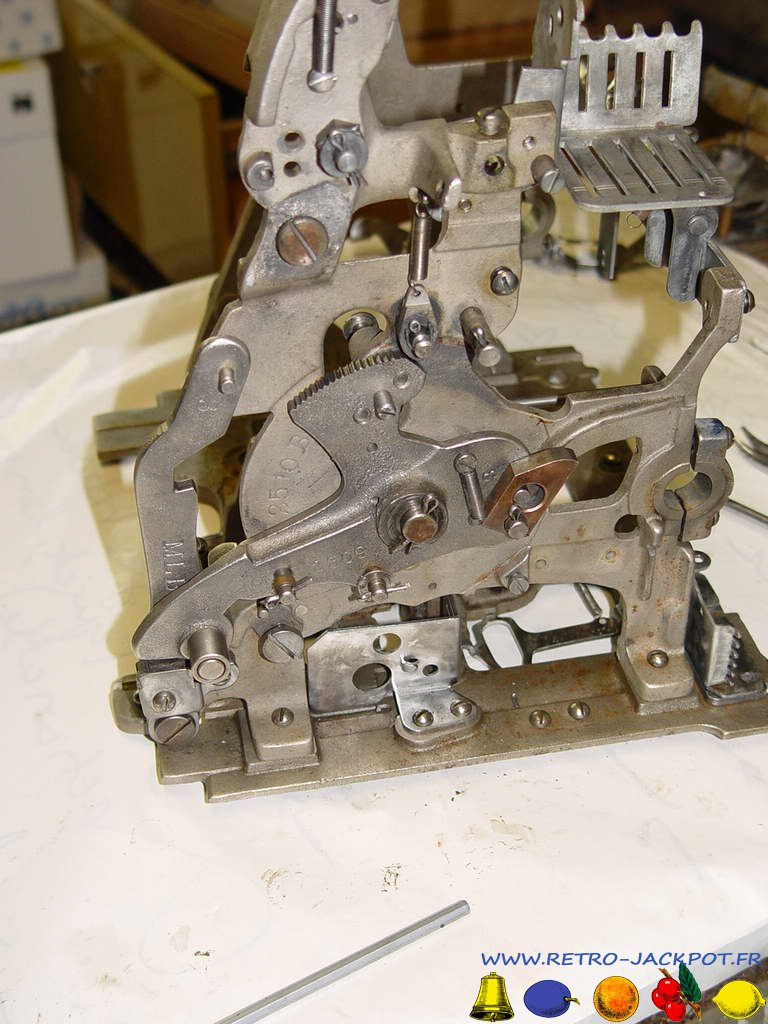
4 : on insert le set "anti-check payout control lever"
![remontage_castle_front_07](/images/phocagallery/MILLS/remontage_castle_front/thumbs/phoca_thumb_m_remontage_castle_front_07.jpg)
5 : puis le set "overflow pushlever & coin overflow pushlever"
![remontage_castle_front_08](/images/phocagallery/MILLS/remontage_castle_front/thumbs/phoca_thumb_m_remontage_castle_front_08.jpg)
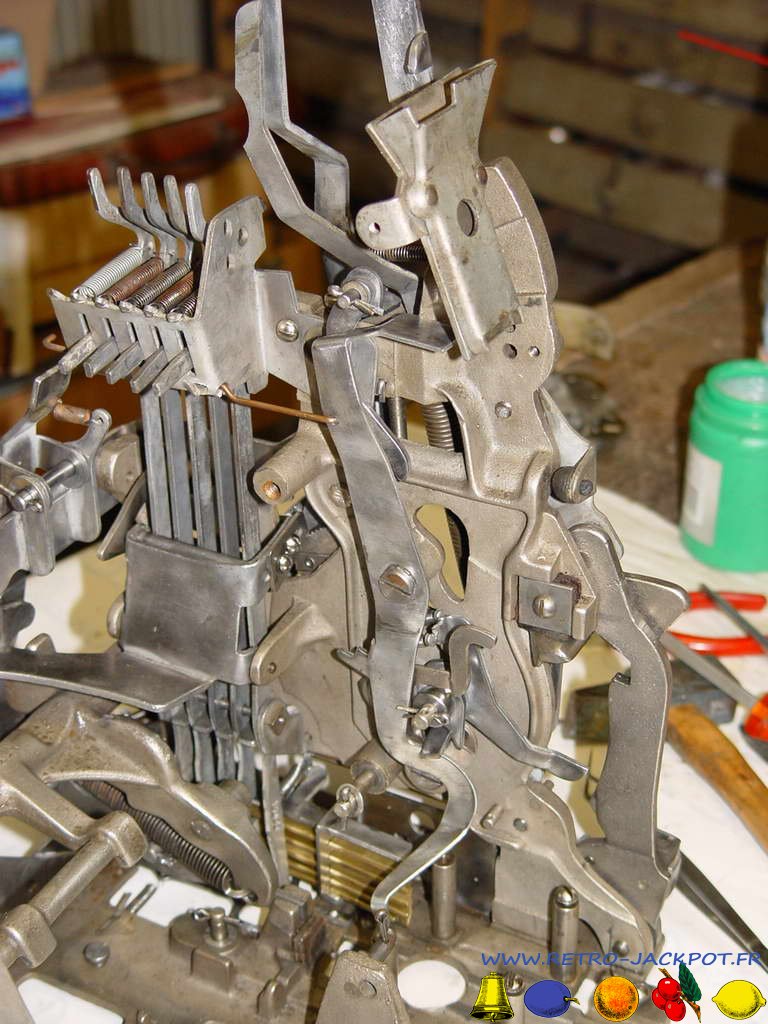
6 : le "check detector operating arm assembly" et son ressort plus le "main operating lever spring"
![remontage_castle_front_09](/images/phocagallery/MILLS/remontage_castle_front/thumbs/phoca_thumb_m_remontage_castle_front_09.jpg)
7 : le "coin advance bar operating lever" avec son ressort
![remontage_castle_front_10](/images/phocagallery/MILLS/remontage_castle_front/thumbs/phoca_thumb_m_remontage_castle_front_10.jpg)
8 : le set "operating lever stop" (souvent enlevé)
![remontage_castle_front_11](/images/phocagallery/MILLS/remontage_castle_front/thumbs/phoca_thumb_m_remontage_castle_front_11.jpg)
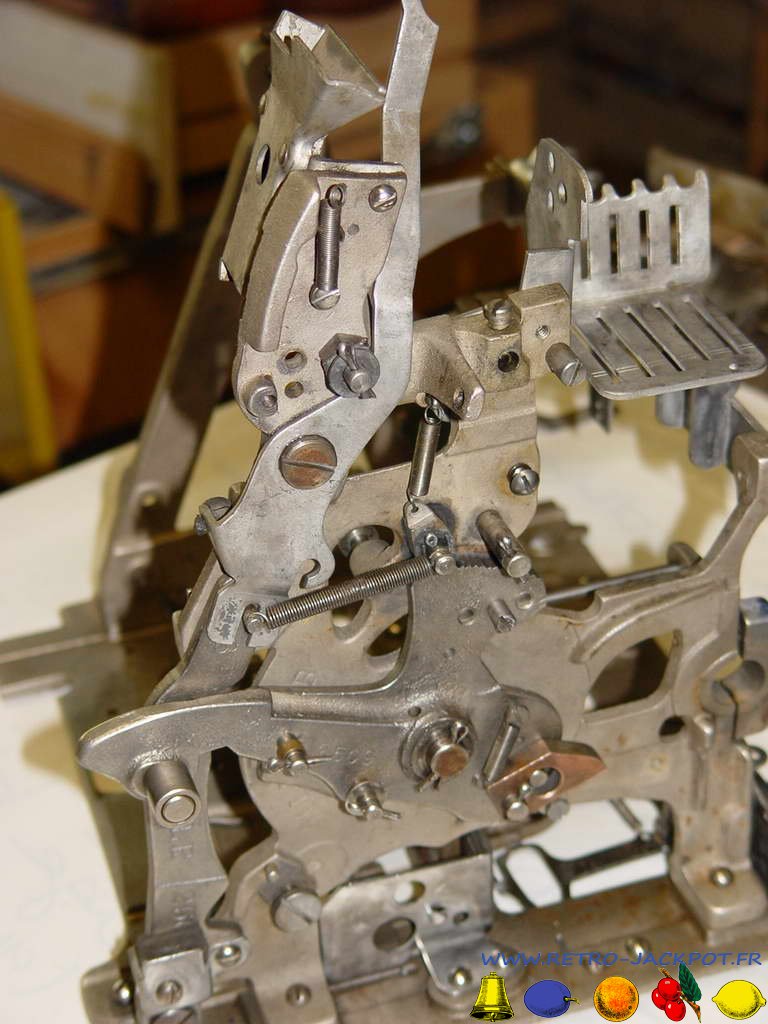
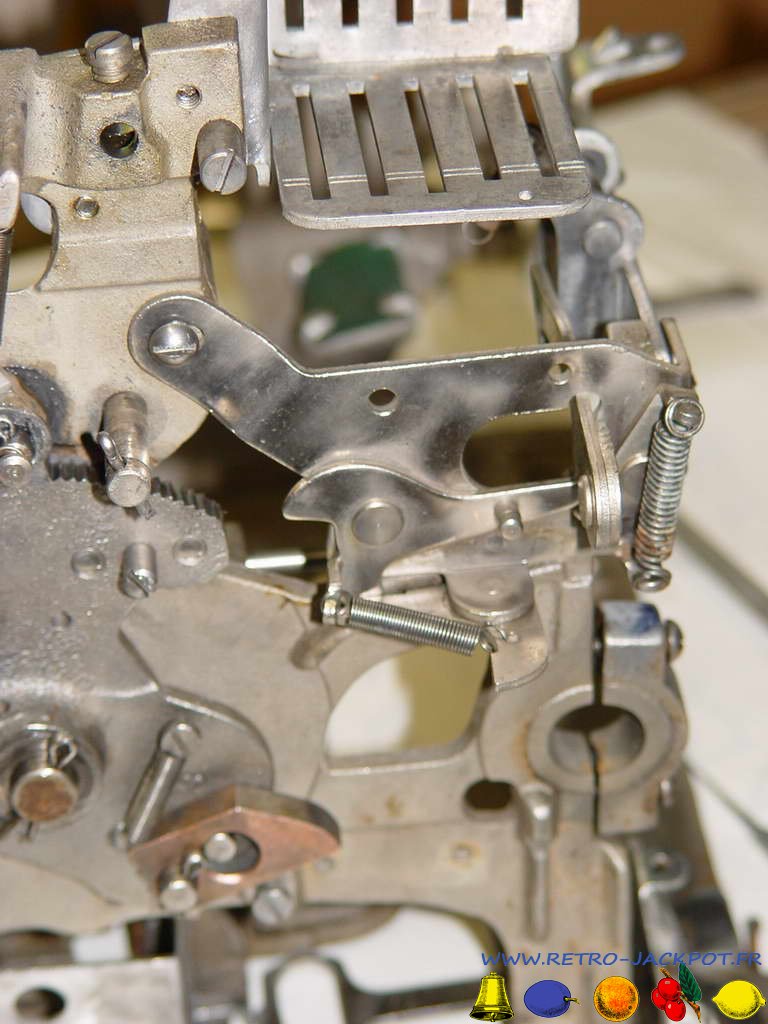
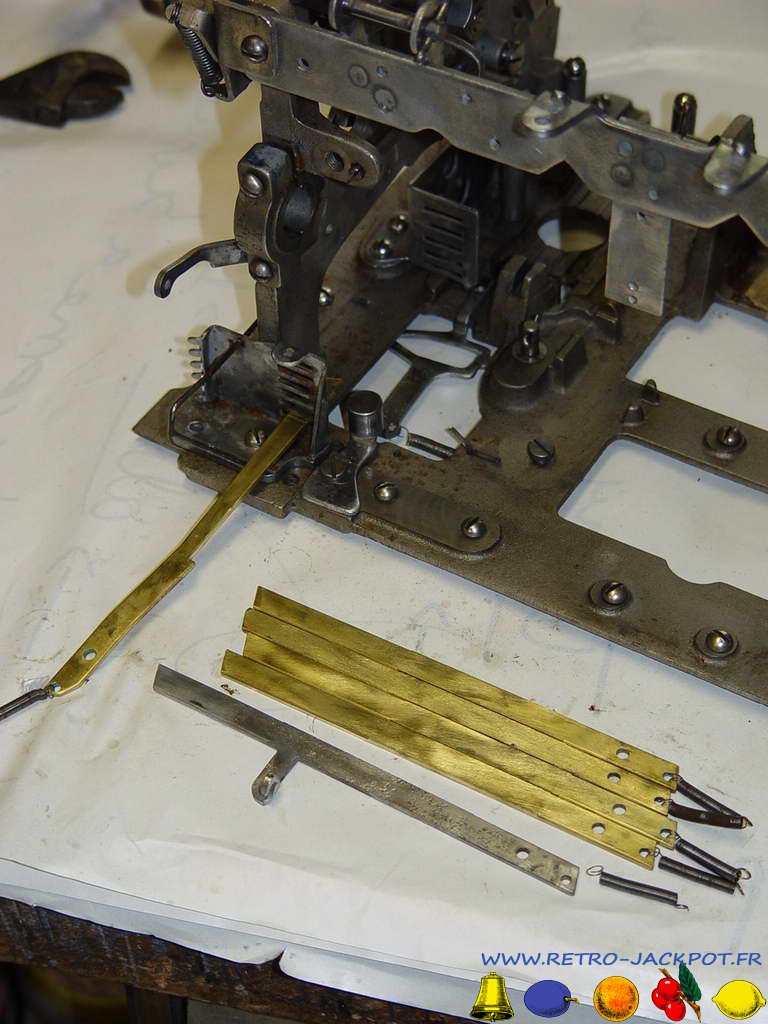
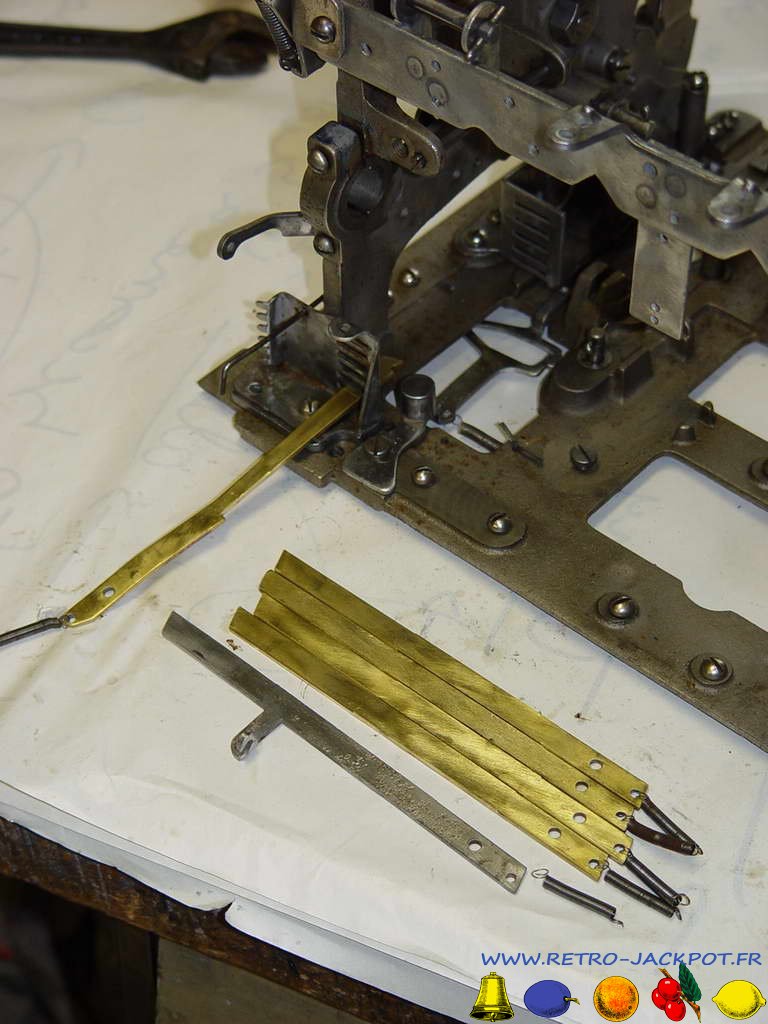
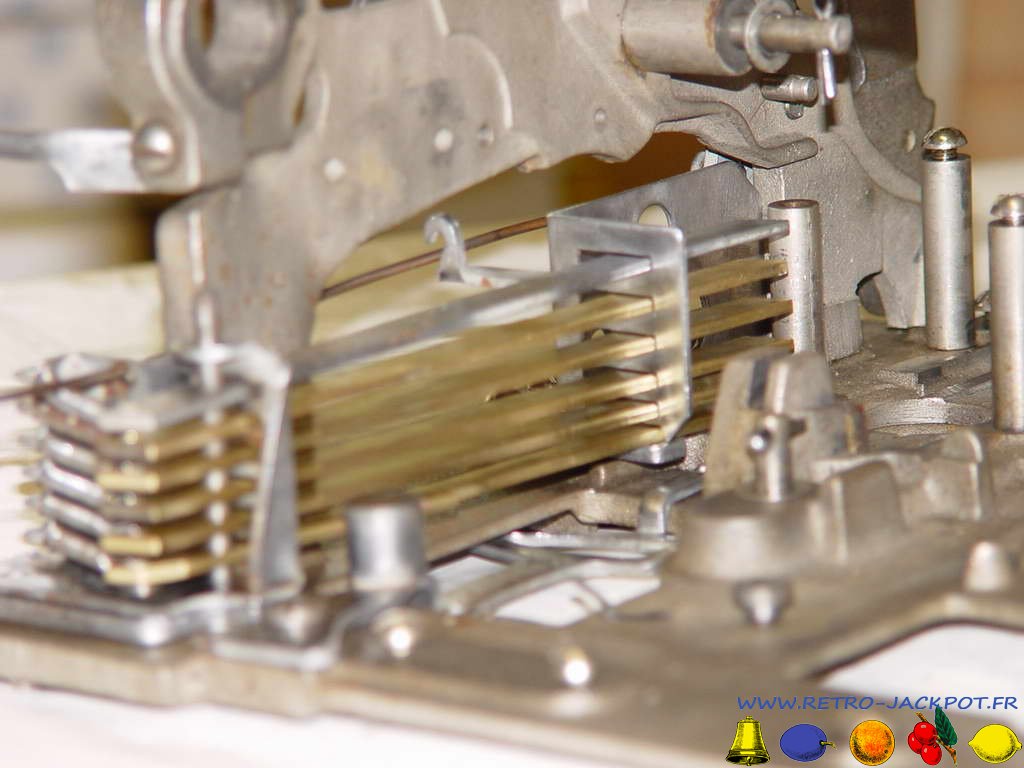
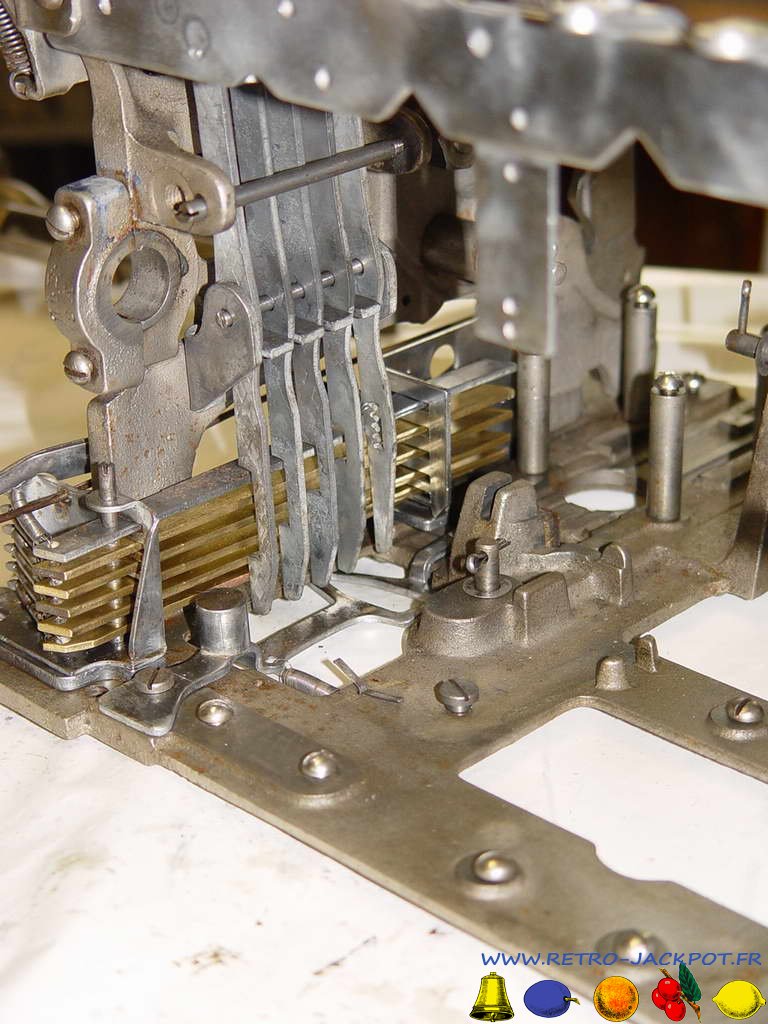
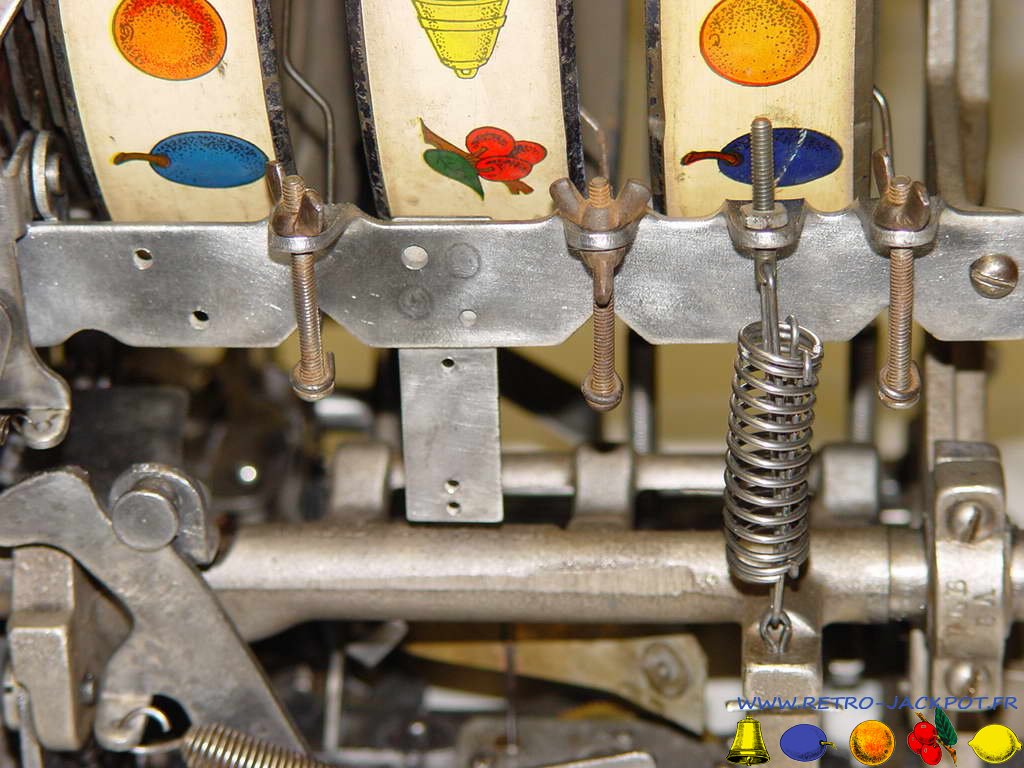
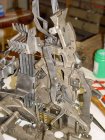
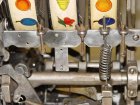
9 : les "horizontal payout lever". Attention le premier et le dernier sont différents
![remontage_castle_front_12](/images/phocagallery/MILLS/remontage_castle_front/thumbs/phoca_thumb_m_remontage_castle_front_12.jpg)
Le dernier levier paye le jackpot et il y a un trou pour un ressort
![remontage_castle_front_14](/images/phocagallery/MILLS/remontage_castle_front/thumbs/phoca_thumb_m_remontage_castle_front_14.jpg)
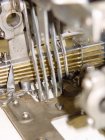
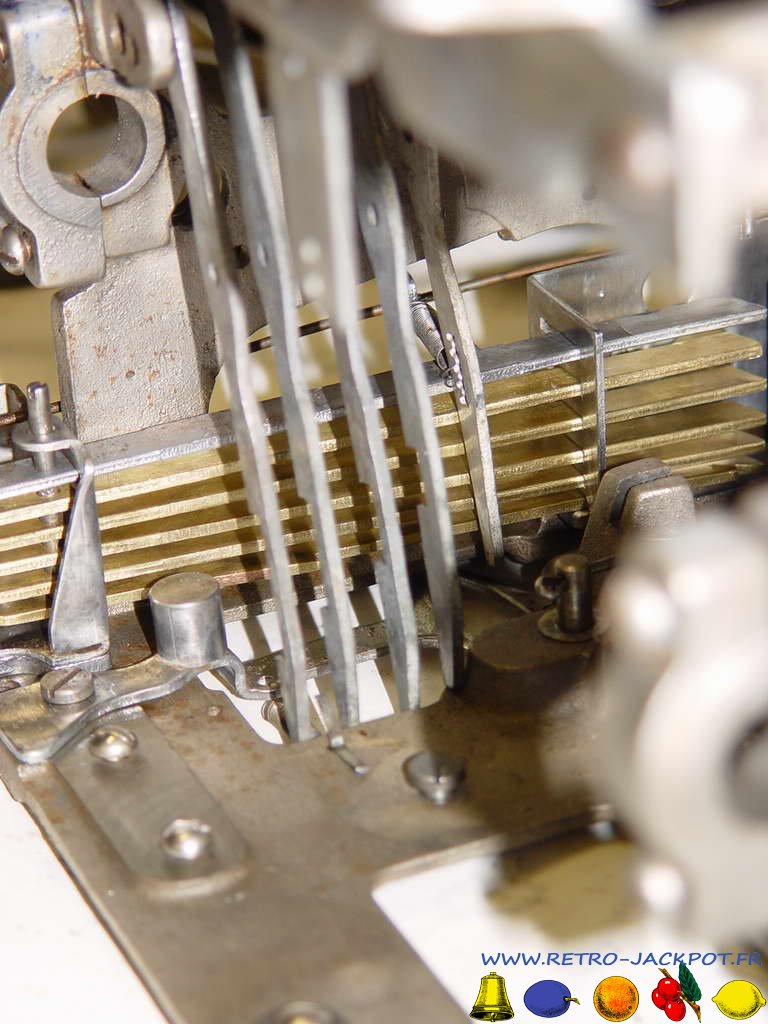
10 : le set "vertical payout lever". Notez le ressort sur le 6ème levier
![remontage_castle_front_15](/images/phocagallery/MILLS/remontage_castle_front/thumbs/phoca_thumb_m_remontage_castle_front_15.jpg)
Notez l'ordre des leviers.... Très important
![remontage_castle_front_17](/images/phocagallery/MILLS/remontage_castle_front/thumbs/phoca_thumb_m_remontage_castle_front_17.jpg)
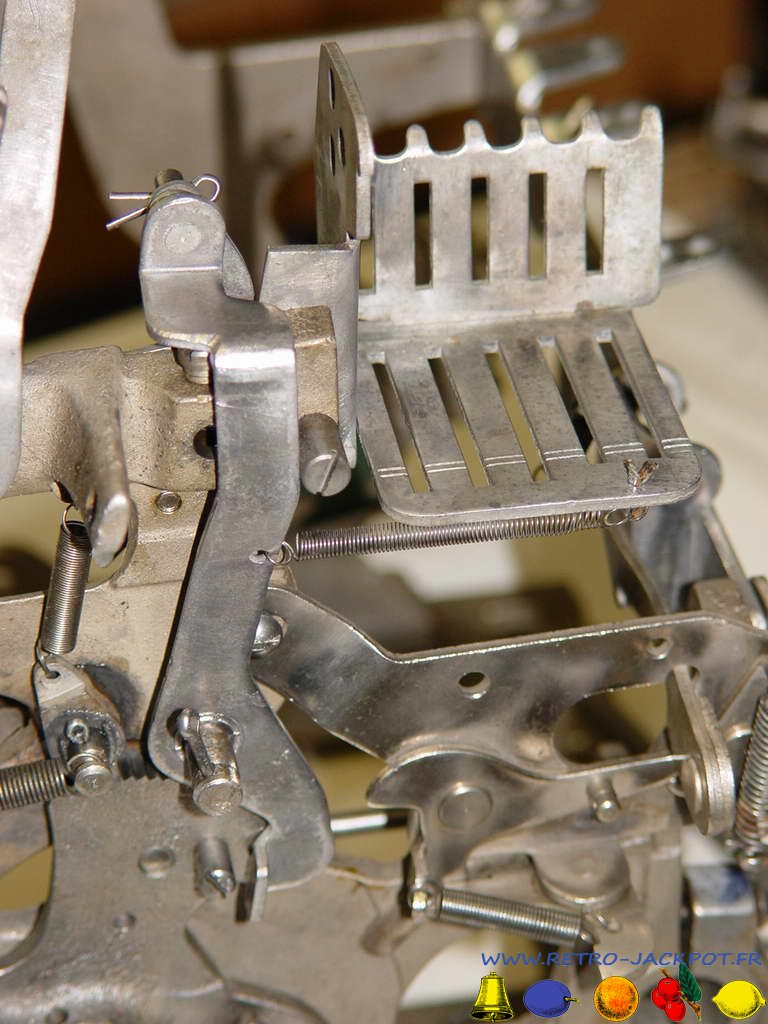
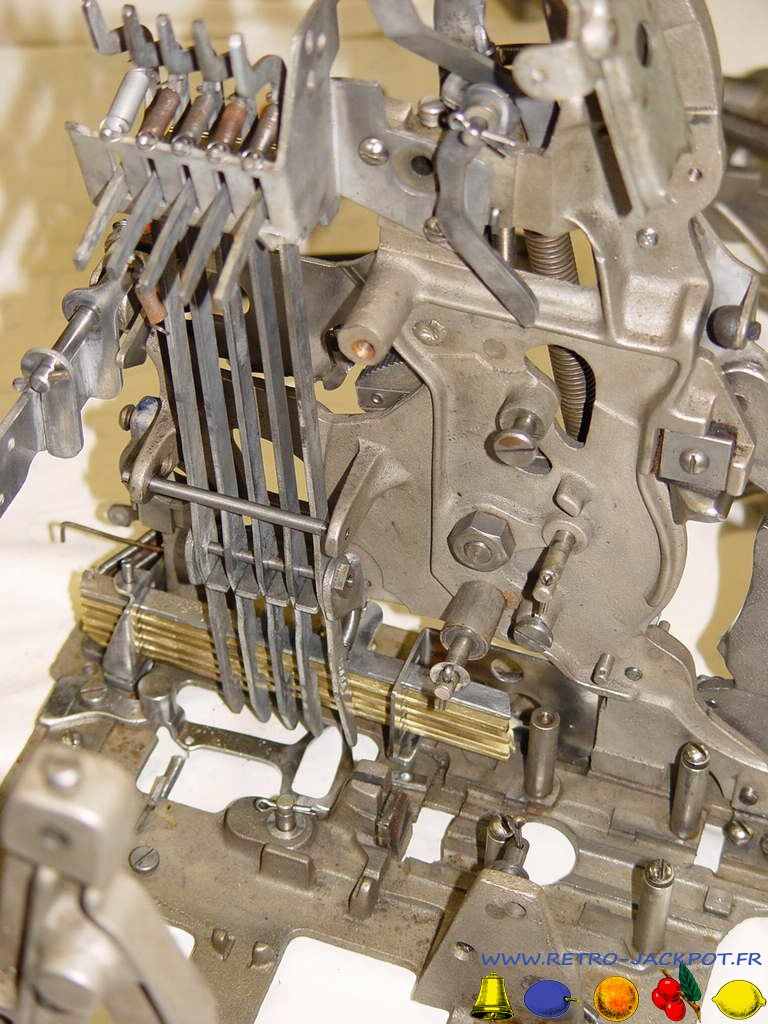
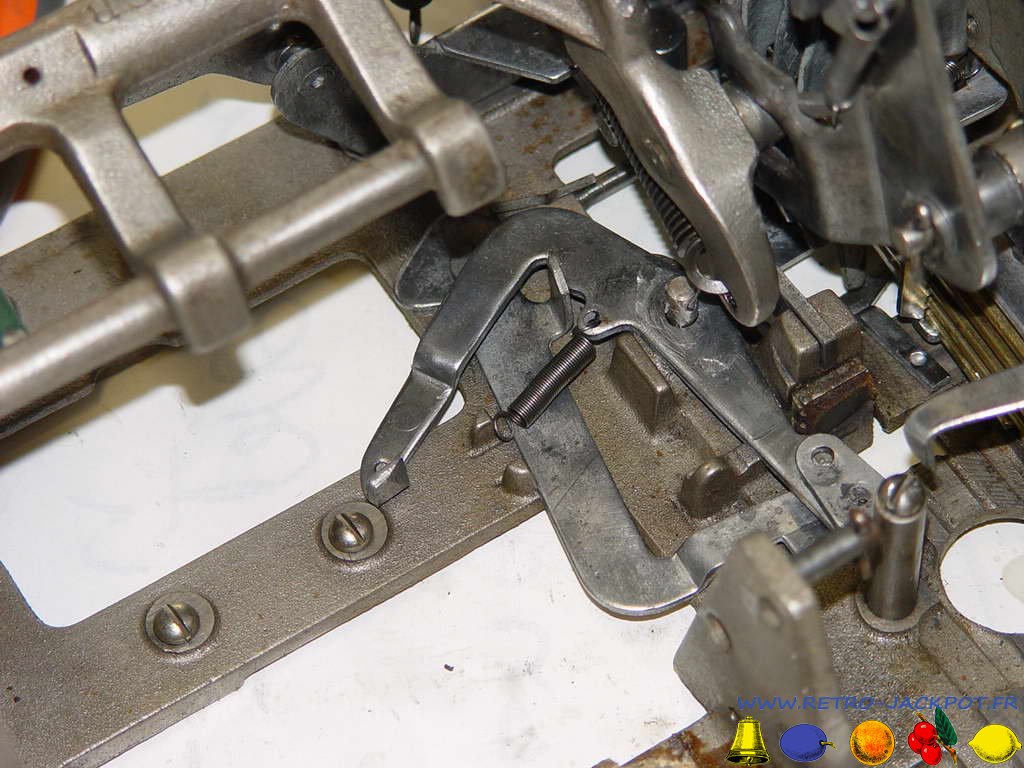
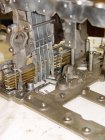
11 : on insert le "operting fork" avec le "release lever assembly" (option). Notez que les demis entraxes ont un sens....
![remontage_castle_front_18](/images/phocagallery/MILLS/remontage_castle_front/thumbs/phoca_thumb_m_remontage_castle_front_18.jpg)
12 : le "timing lever bracket" et le set "payout slide pushbar"...
![remontage_castle_front_20](/images/phocagallery/MILLS/remontage_castle_front/thumbs/phoca_thumb_m_remontage_castle_front_20.jpg)
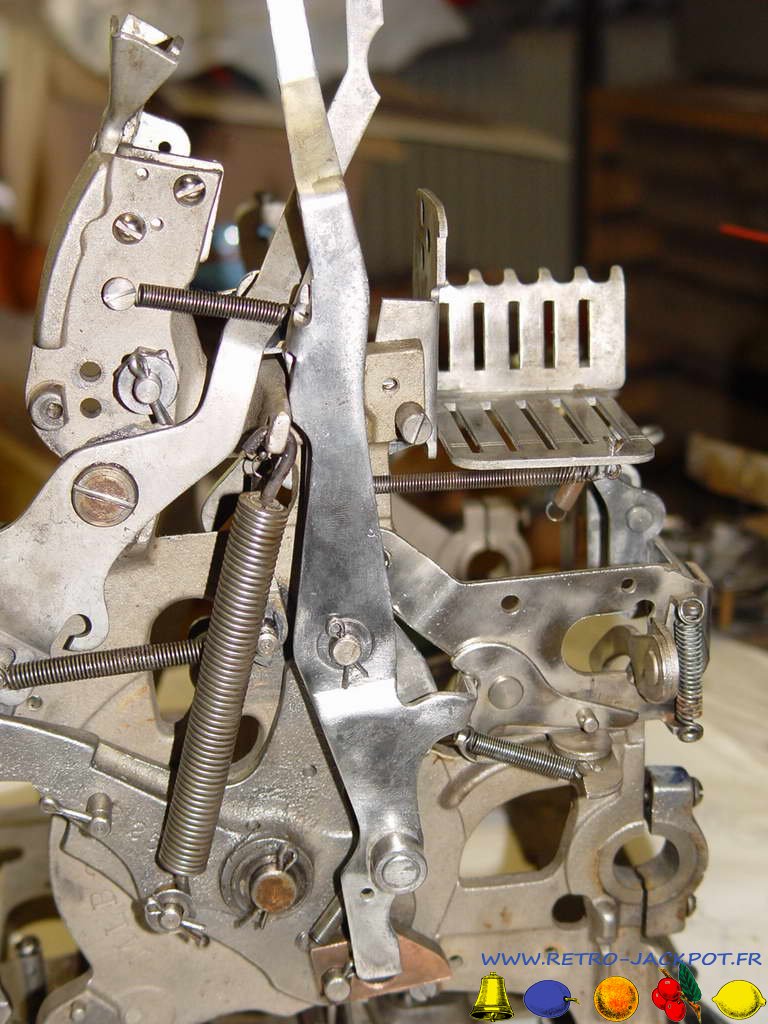
13 : le "timing lever" et le "vertical payout pushback lever"
![remontage_castle_front_21](/images/phocagallery/MILLS/remontage_castle_front/thumbs/phoca_thumb_m_remontage_castle_front_21.jpg)
14 : le "disc stop lever"
![remontage_castle_front_22](/images/phocagallery/MILLS/remontage_castle_front/thumbs/phoca_thumb_m_remontage_castle_front_22.jpg)
15 : le set "coin tube shutoff detection lever"
![remontage_castle_front_23](/images/phocagallery/MILLS/remontage_castle_front/thumbs/phoca_thumb_m_remontage_castle_front_23.jpg)
16 : et le "coin tube shutoff lever"
![remontage_castle_front_24](/images/phocagallery/MILLS/remontage_castle_front/thumbs/phoca_thumb_m_remontage_castle_front_24.jpg)
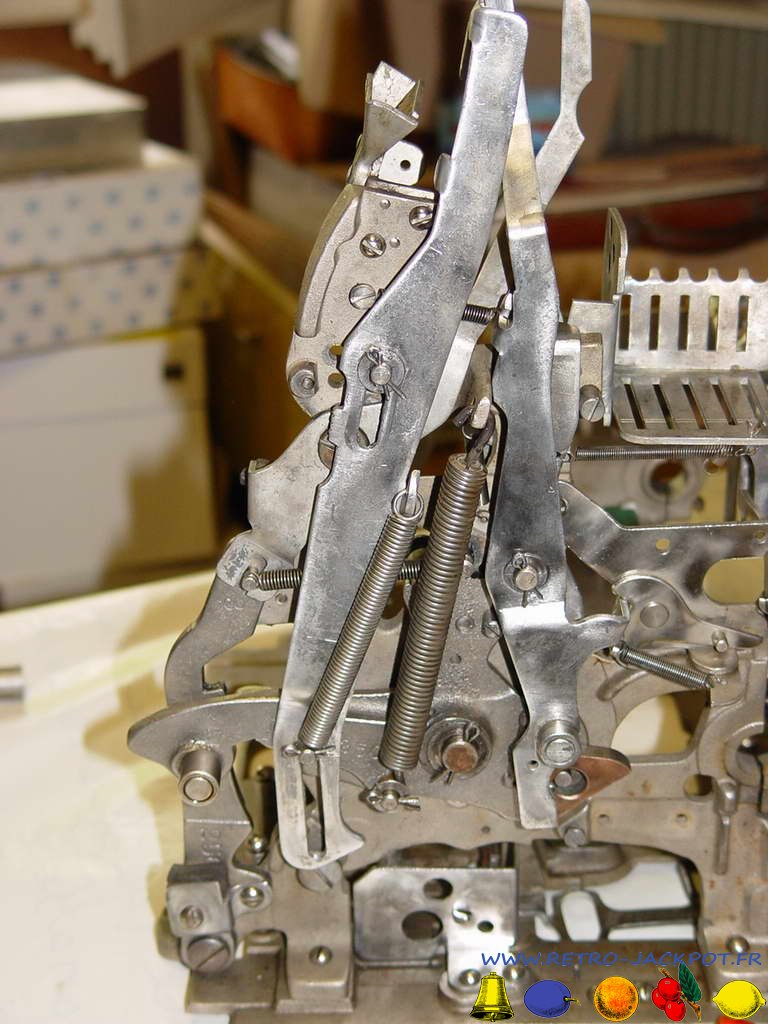
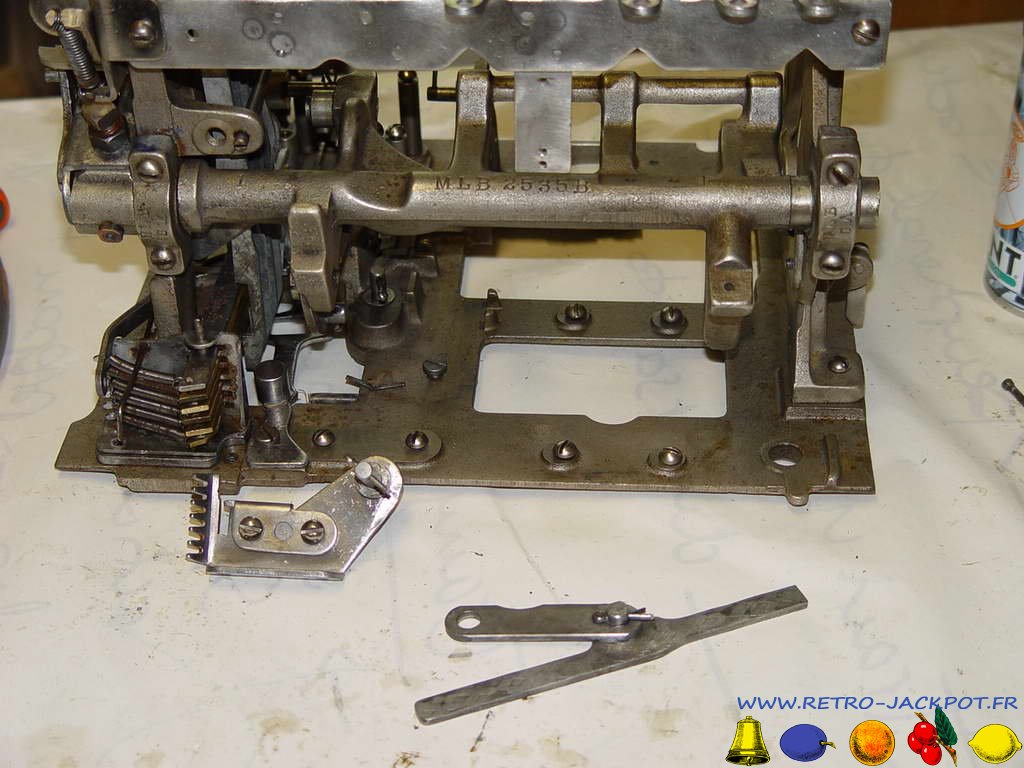
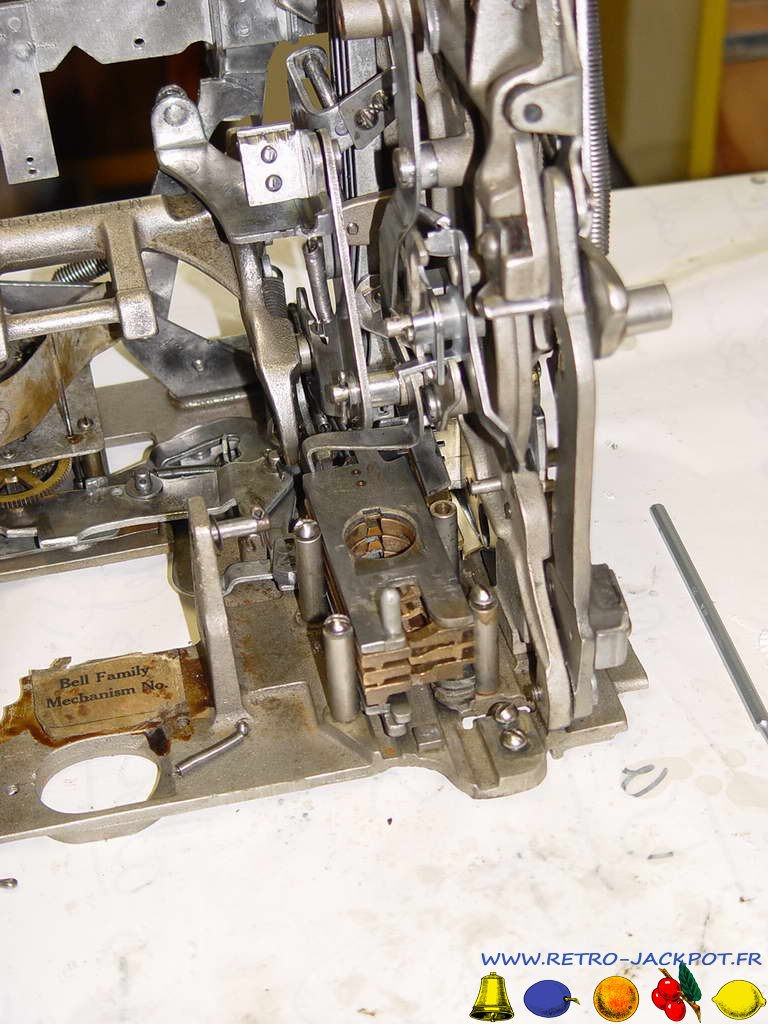
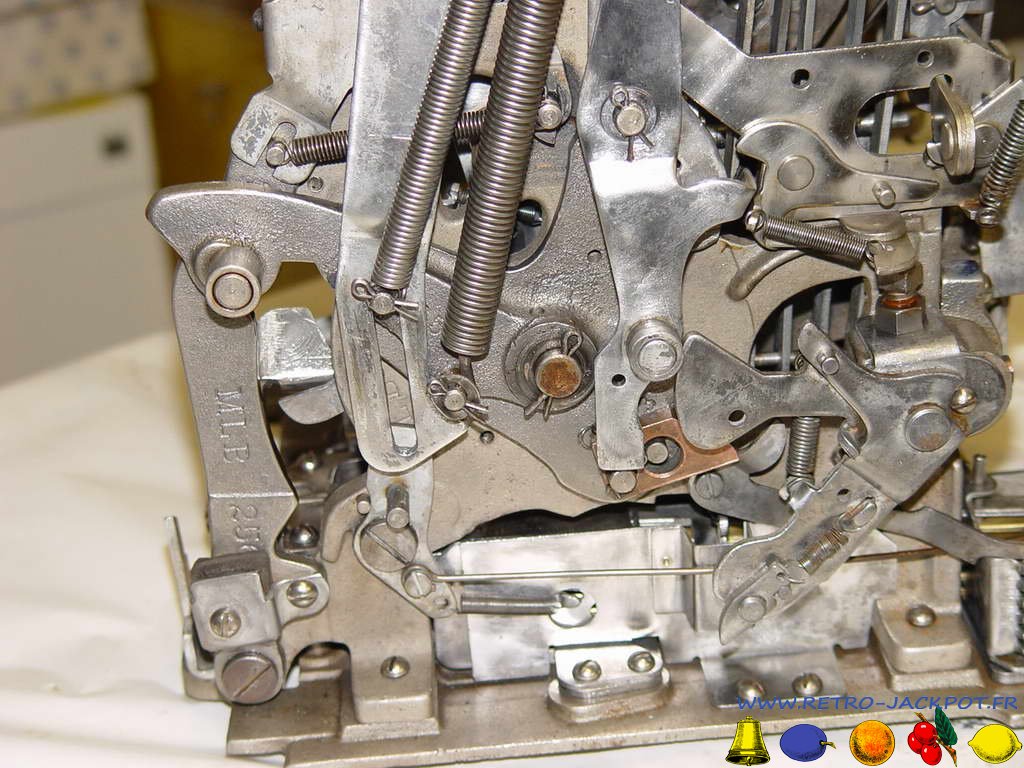
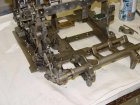
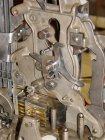
17 : le "reel operating lever assembly" ou appelé le "kicker"
![remontage_castle_front_25](/images/phocagallery/MILLS/remontage_castle_front/thumbs/phoca_thumb_m_remontage_castle_front_25.jpg)
18 : le "payout slide lock lever" avec son ressort, et le "payout slide stop lever"
![remontage_castle_front_26](/images/phocagallery/MILLS/remontage_castle_front/thumbs/phoca_thumb_m_remontage_castle_front_26.jpg)
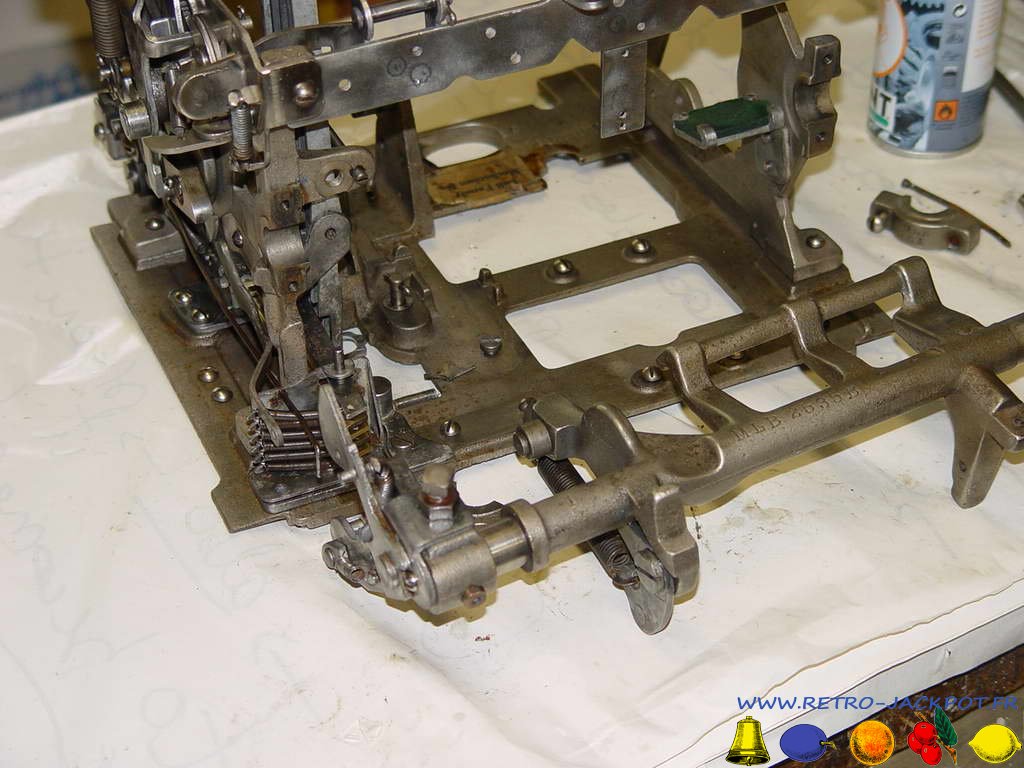
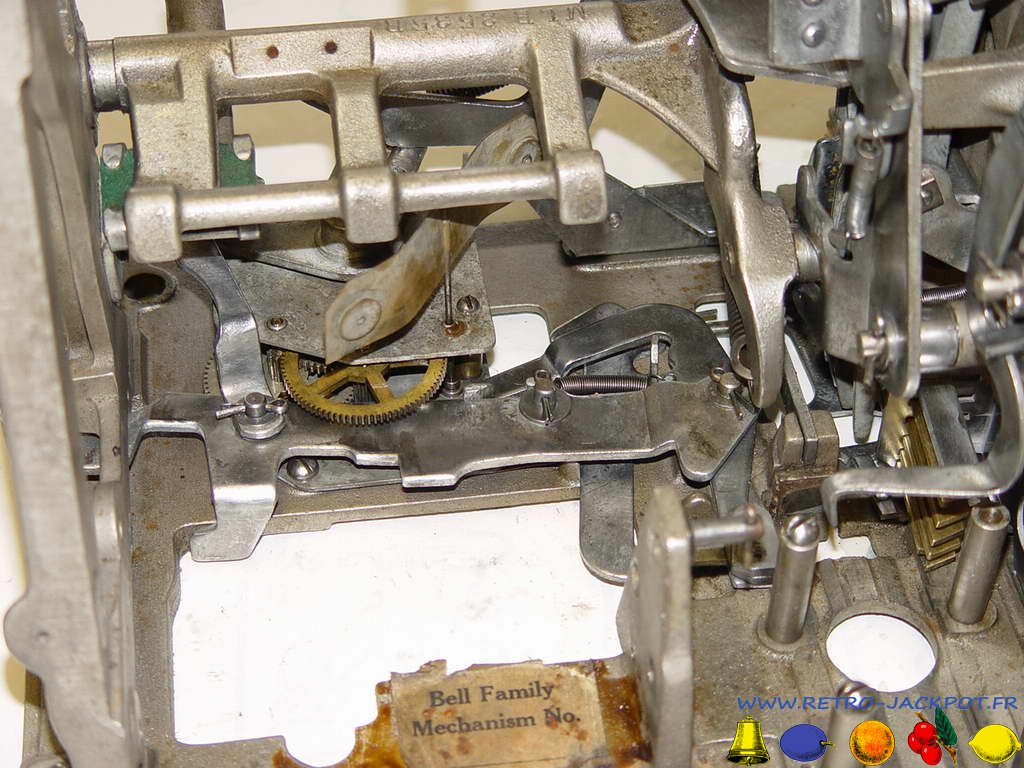
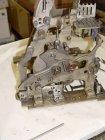
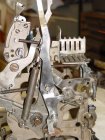
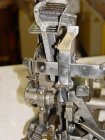
19 : le "reel time lever" avec la jonction vers le régulateur...
![remontage_castle_front_27](/images/phocagallery/MILLS/remontage_castle_front/thumbs/phoca_thumb_m_remontage_castle_front_27.jpg)
20 : ... que voici !
L'horloge est juste huilée. Surtout ne pas la graisser.
![remontage_castle_front_29](/images/phocagallery/MILLS/remontage_castle_front/thumbs/phoca_thumb_m_remontage_castle_front_29.jpg)
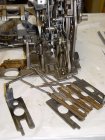
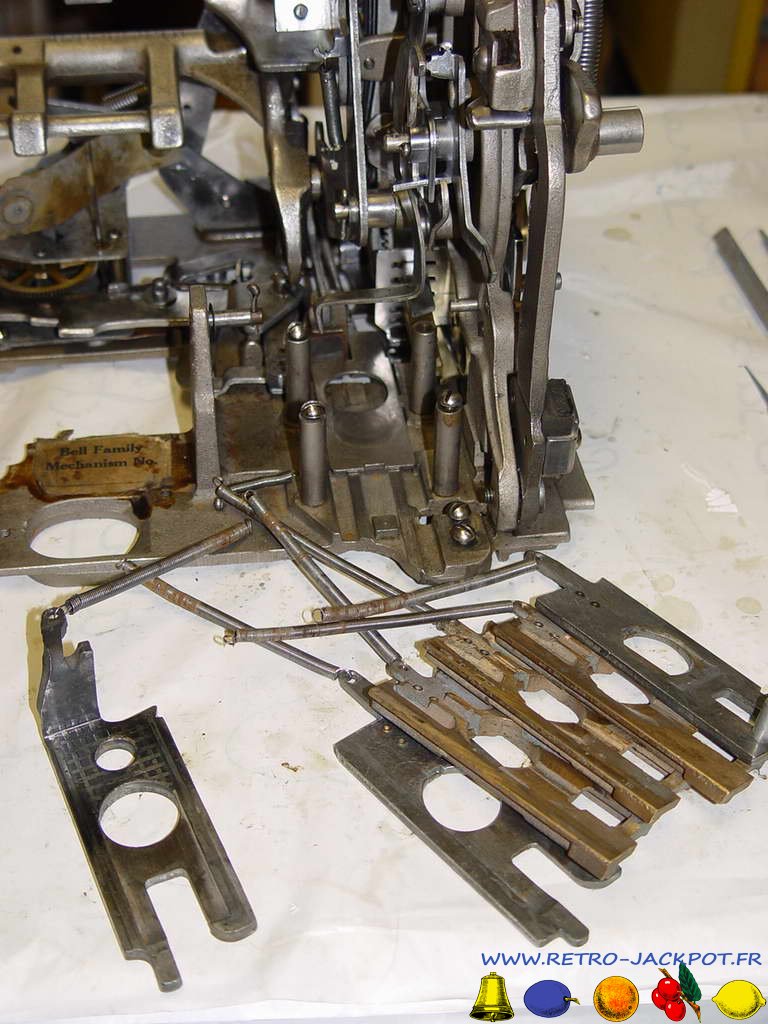
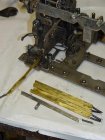
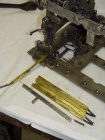
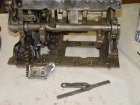
21 : On assemble les "payout slides". Notez l'ordre...
![remontage_castle_front_30](/images/phocagallery/MILLS/remontage_castle_front/thumbs/phoca_thumb_m_remontage_castle_front_30.jpg)
Les tiroirs sont ni huilés ni graissés (surtout pas). Il faut les poudrer de graphite.
![remontage_castle_front_31](/images/phocagallery/MILLS/remontage_castle_front/thumbs/phoca_thumb_m_remontage_castle_front_31.jpg)
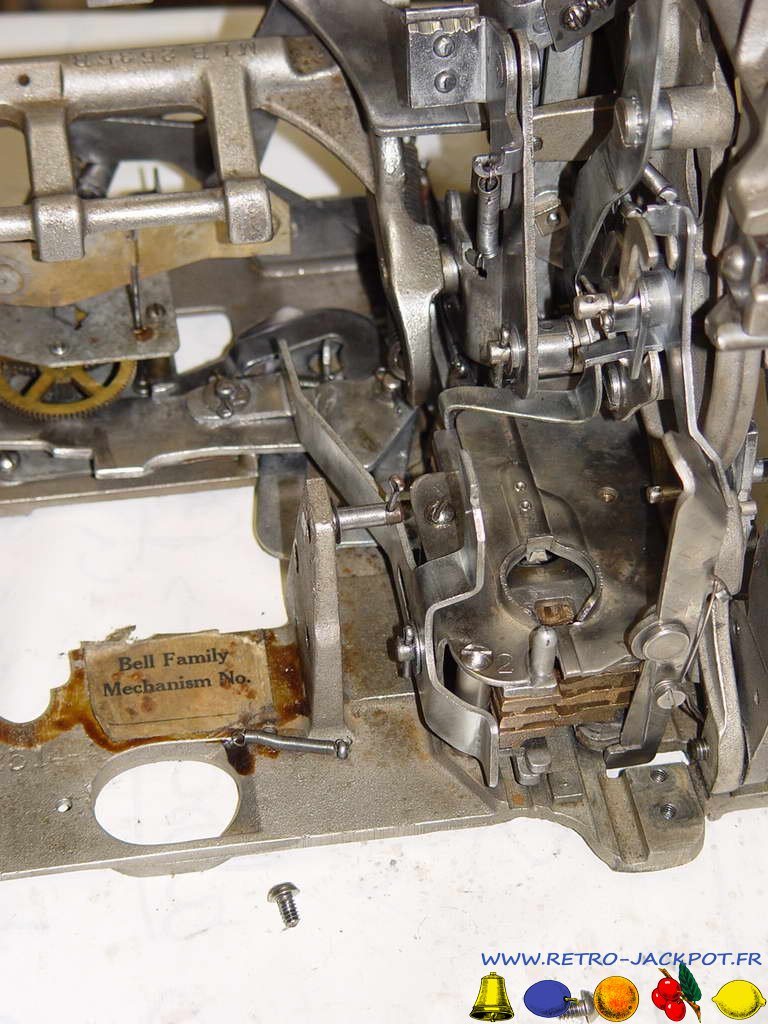
22 : le couvercle avec le "payout slide stop lever" ainsi que le "jackpot pushbar"
![remontage_castle_front_32](/images/phocagallery/MILLS/remontage_castle_front/thumbs/phoca_thumb_m_remontage_castle_front_32.jpg)
23 : les "reels stop lever" sont assemblées
![remontage_castle_front_33](/images/phocagallery/MILLS/remontage_castle_front/thumbs/phoca_thumb_m_remontage_castle_front_33.jpg)
24 : puis on insert les ressorts ainsi que le "fan stop lever assembly"
![remontage_castle_front_34](/images/phocagallery/MILLS/remontage_castle_front/thumbs/phoca_thumb_m_remontage_castle_front_34.jpg)
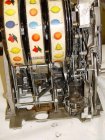
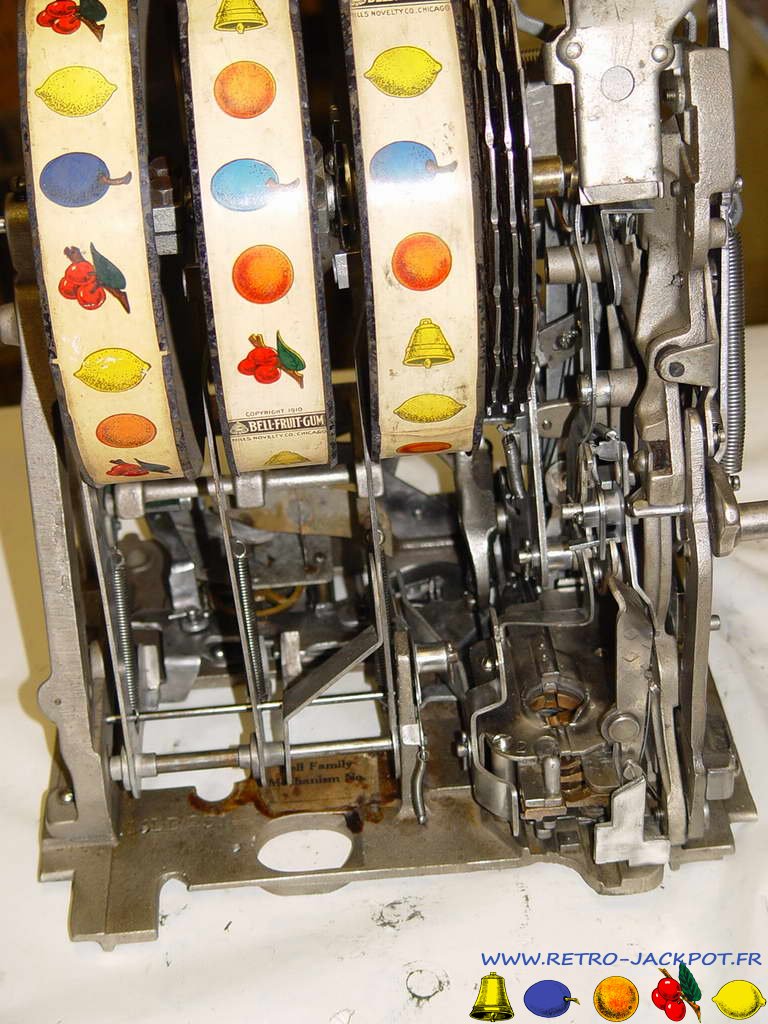
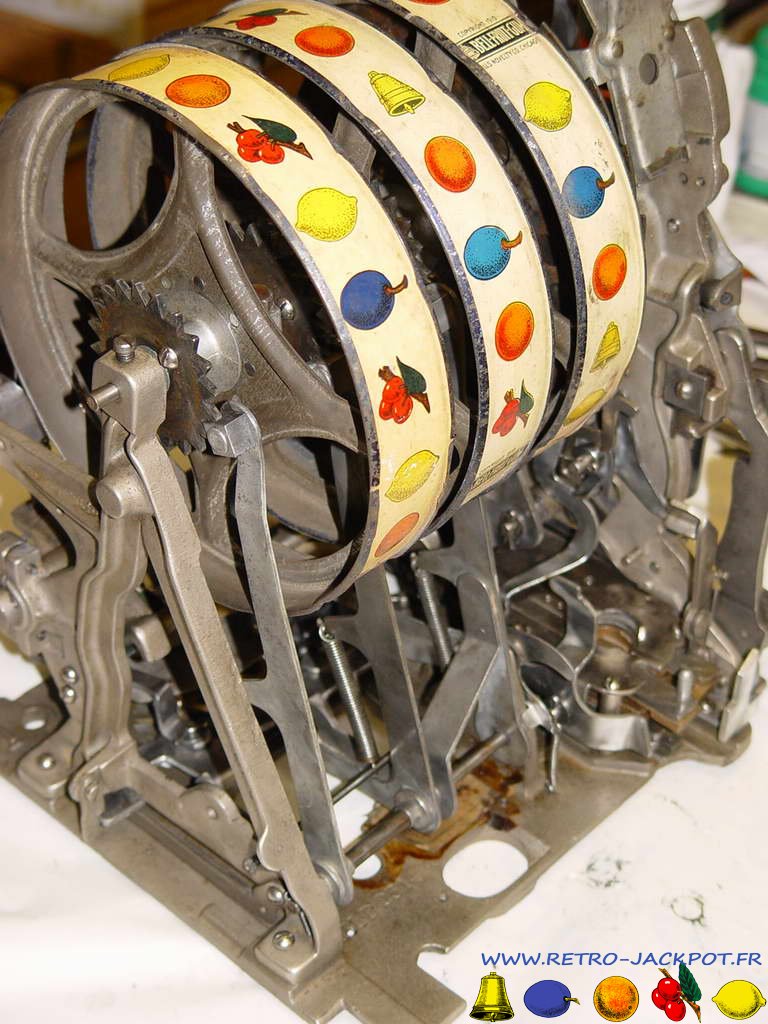
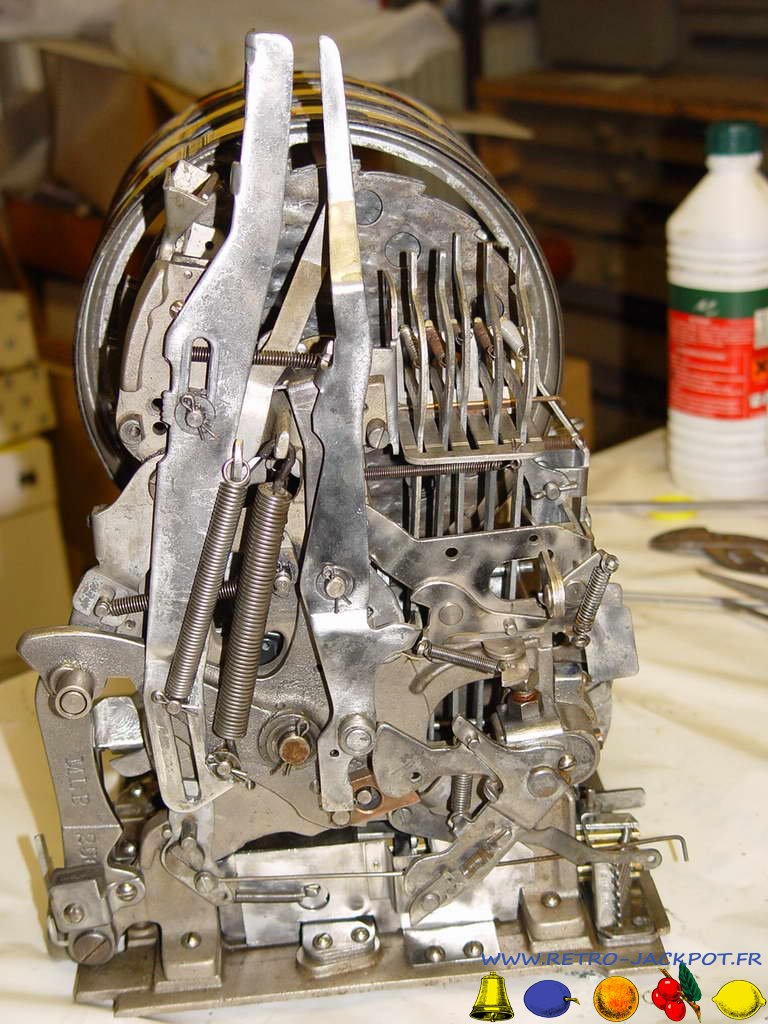
25 : Après l'armement partiel de la machine, on insert les rouleaux puis l'axe de ce dernier.
![remontage_castle_front_38](/images/phocagallery/MILLS/remontage_castle_front/thumbs/phoca_thumb_m_remontage_castle_front_38.jpg)
26 : La protection des payout slides est insérée
(souvent absent)
![remontage_castle_front_40](/images/phocagallery/MILLS/remontage_castle_front/thumbs/phoca_thumb_m_remontage_castle_front_40.jpg)
27 : les freins sont remis (souvent absent) ainsi que le resort réglable (souvent absent aussi)